
SendGrid Integration Overview and Setup
SendGrid integration enables you to send customer emails from your own domain, giving you control over deliverability and brand consistency. Route invoices, payment receipts, and contract notifications through your SendGrid account.
Key Capabilities
Custom domain sending: Send emails from your verified domain instead of Measure’s default.
Improved deliverability: Use your domain’s reputation and SendGrid’s delivery infrastructure.
Email tracking: Track opens, clicks, bounces, and spam reports for all customer communications.
Consistent branding: Maintain your brand identity across all customer touchpoints.
Email Types
All customer-facing emails from Measure can be routed through SendGrid:
Invoice emails: Invoice delivery and payment reminders.
Payment receipts: Confirmation emails for successful payments.
Contract notifications: Signature requests and contract status updates.
Tracking and Analytics
With webhook integration, Measure tracks email engagement:
Event | Description |
|---|---|
Delivered | Email successfully delivered to recipient. |
Opened | Recipient opened the email. |
Clicked | Recipient clicked a link in the email. |
Bounced | Email could not be delivered. |
Spam Report | Recipient marked email as spam. |
Email status is visible on invoice and contract records, helping you understand customer engagement and troubleshoot delivery issues.
Requirements
Verified domain or sender signature in SendGrid.
SendGrid API key with Mail Send and Tracking permissions.
1. Log in to SendGrid and Verify your Domain
Log into your SendGrid account, and verify your domain or sender signature if you have not already. See SendGrid's article, How to set up domain authentication, for more details.
⚠️ This needs to be completed for us to be able to use your “From” address.
2. Get API Key from SendGrid
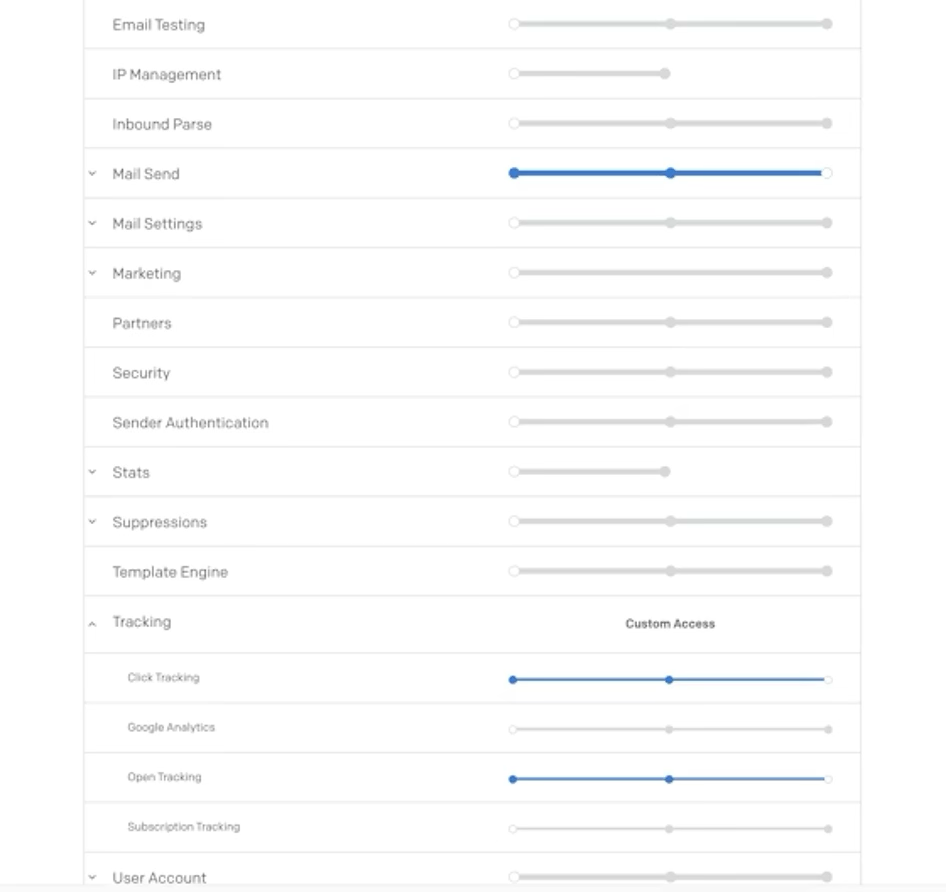
Visit the API Keys page in SendGrid. Click on the Create API Key button. Ensure you have provided Full Access for:
Mail Send
Tracking -> Click Tracking, Open Tracking
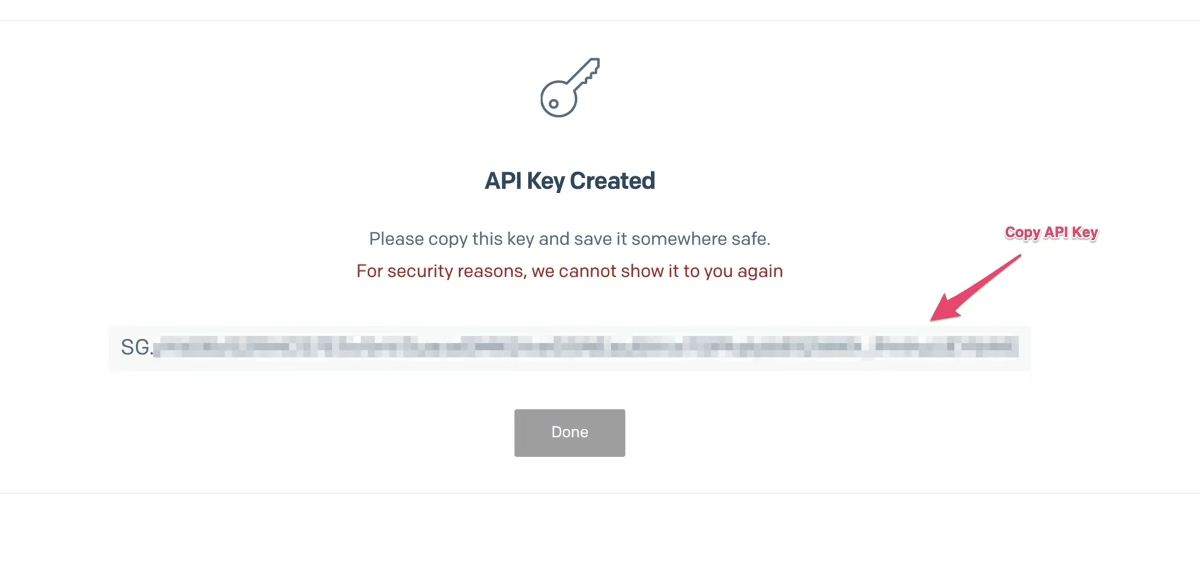
Click Create and View. Then, copy the API Key generated.
3. Install the SendGrid Integration in Measure
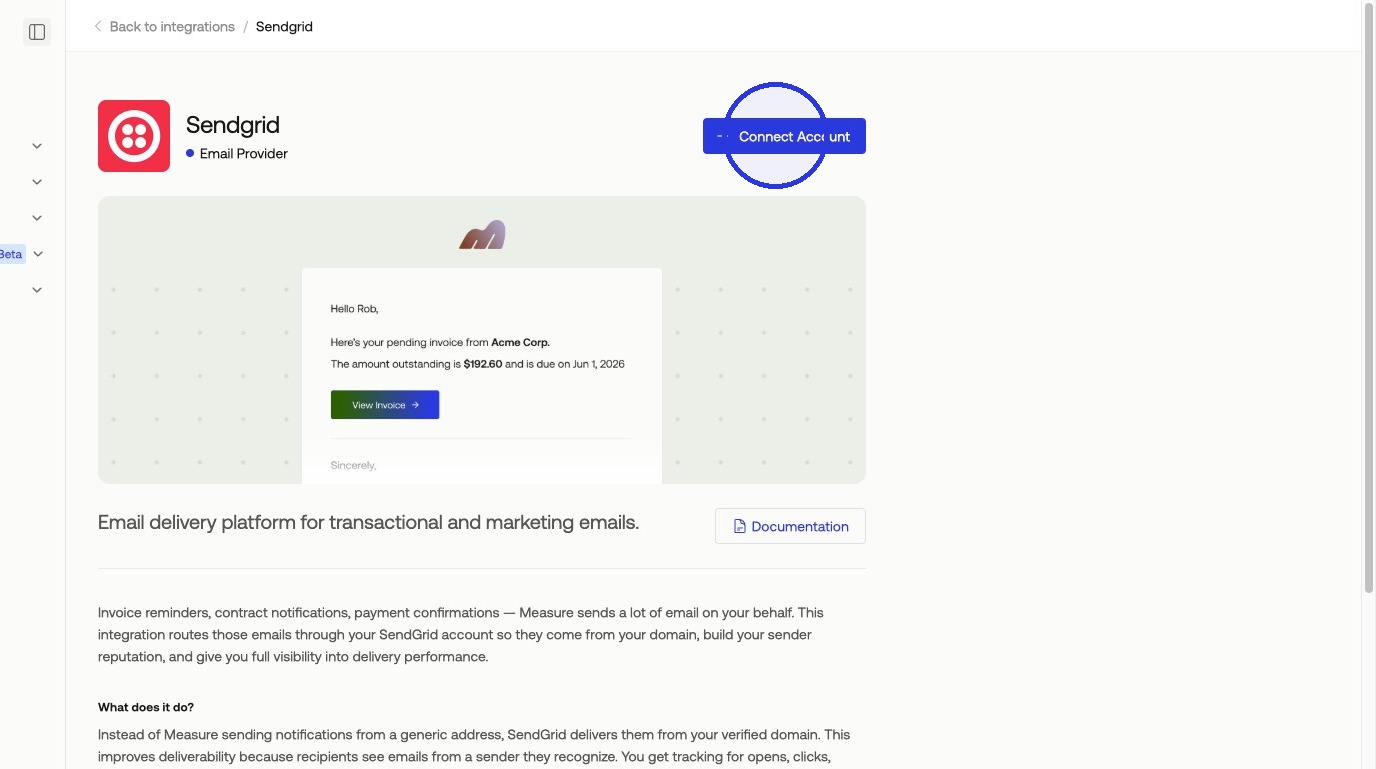
Find the Integrations tab in Measure, and select the SendGrid integration. Click Connect Account.
4. Paste the API Key in Measure
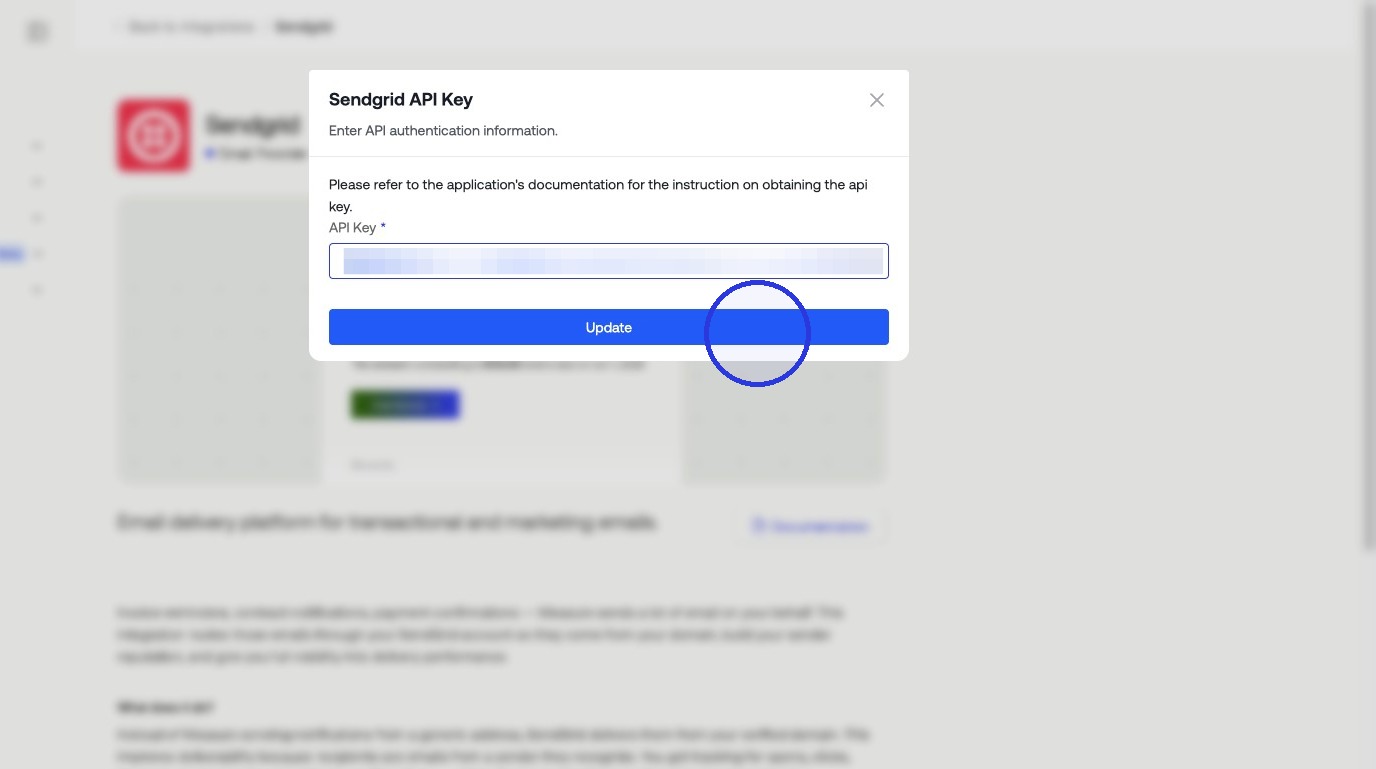
Paste the API key copied from Step 2, then click Update.
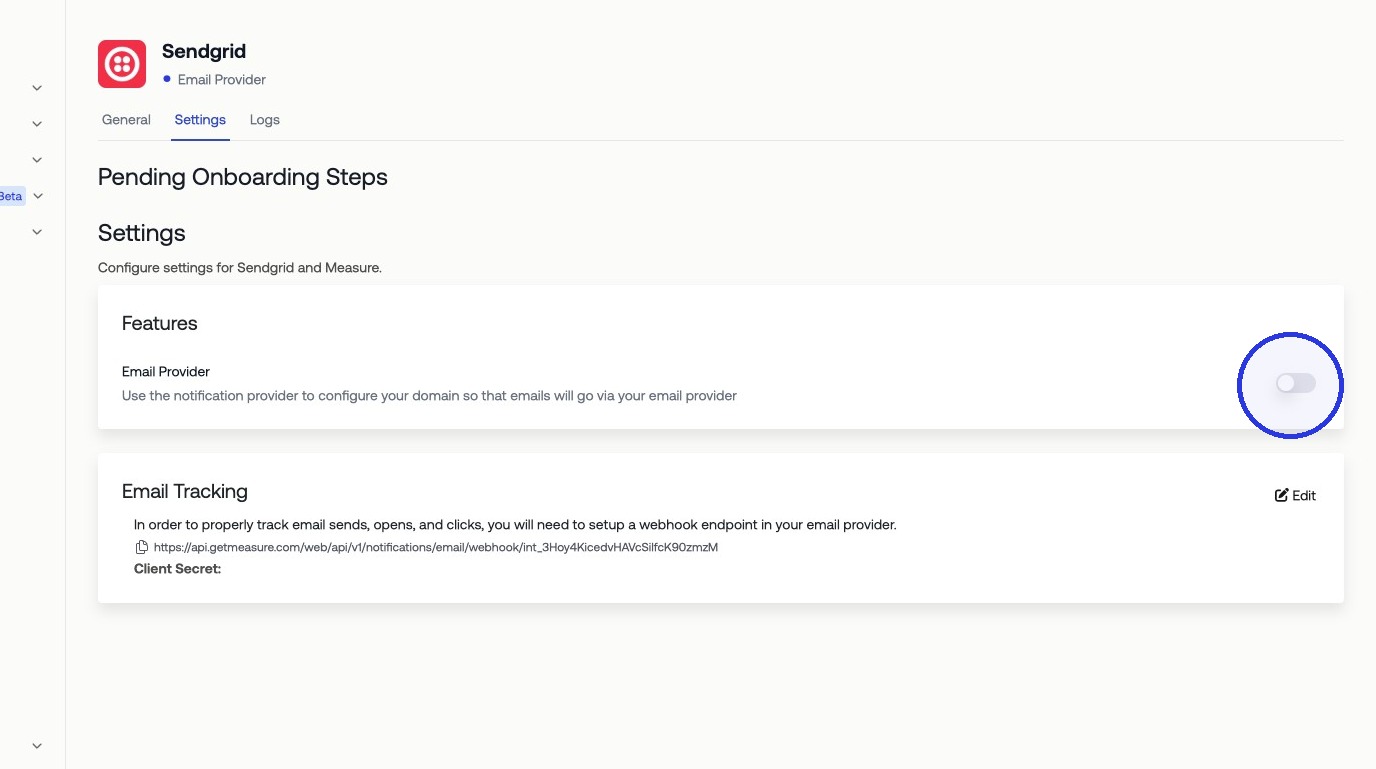
5. Toggle on the Email Provider
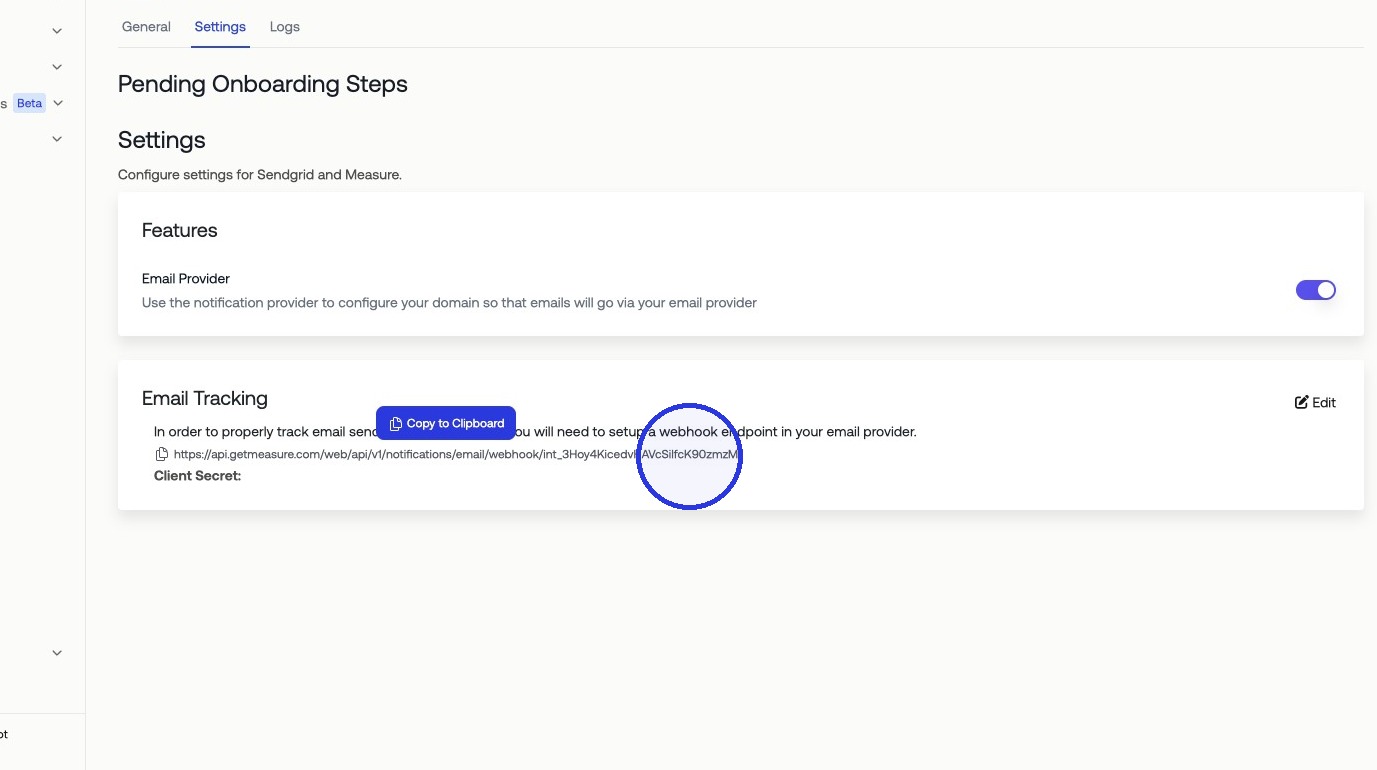
6. Copy Webhook URL from Measure
7. Create a Webhook in SendGrid
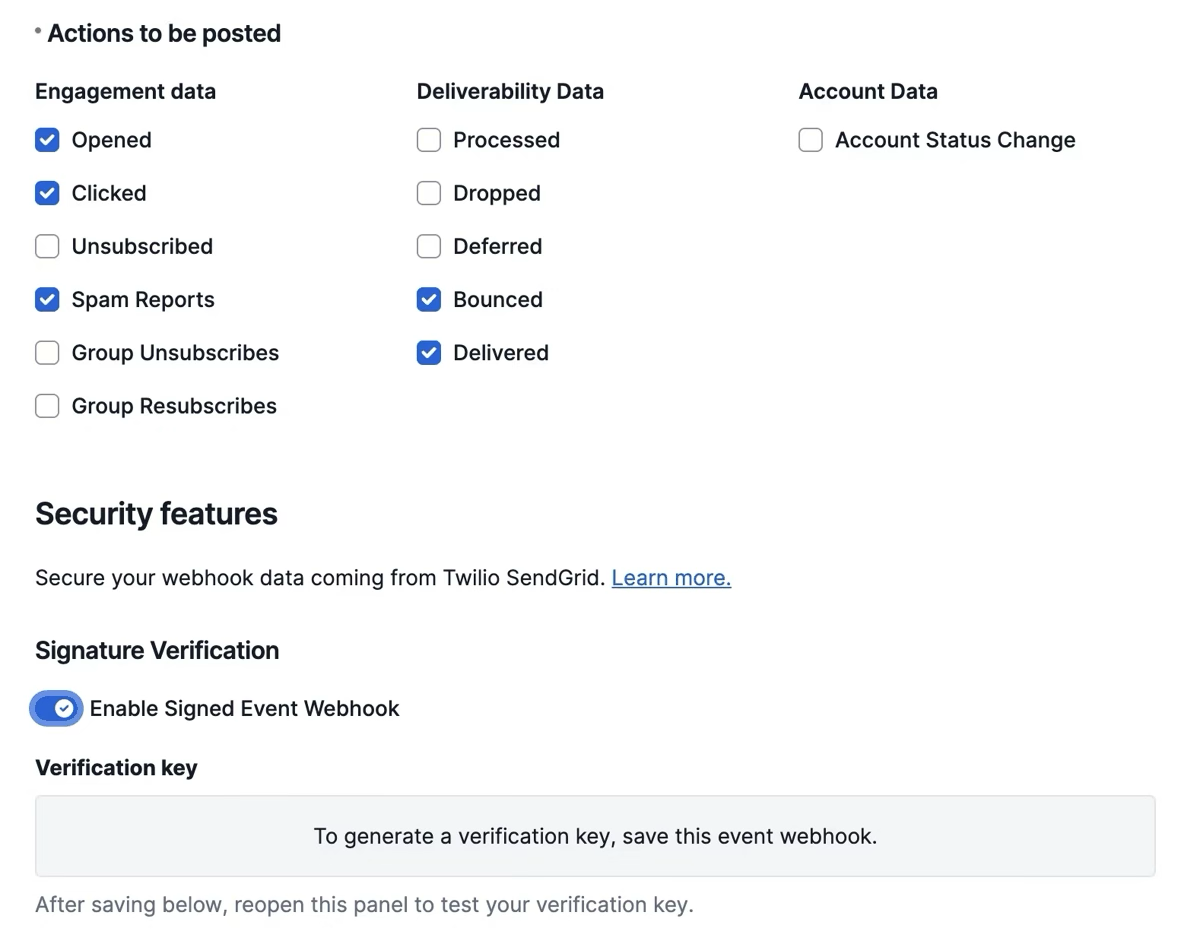
Visit the Mail Settings page in SendGrid. Click on the Create new Webhook button, include a Friendly Name and Post URL copied from Step 6.
1. Ensure the following actions are selected:
Opened
Clicked
Spam Reports
Bounced
Delivered
2. Enable Signed Event Webhook
3. Click Save.
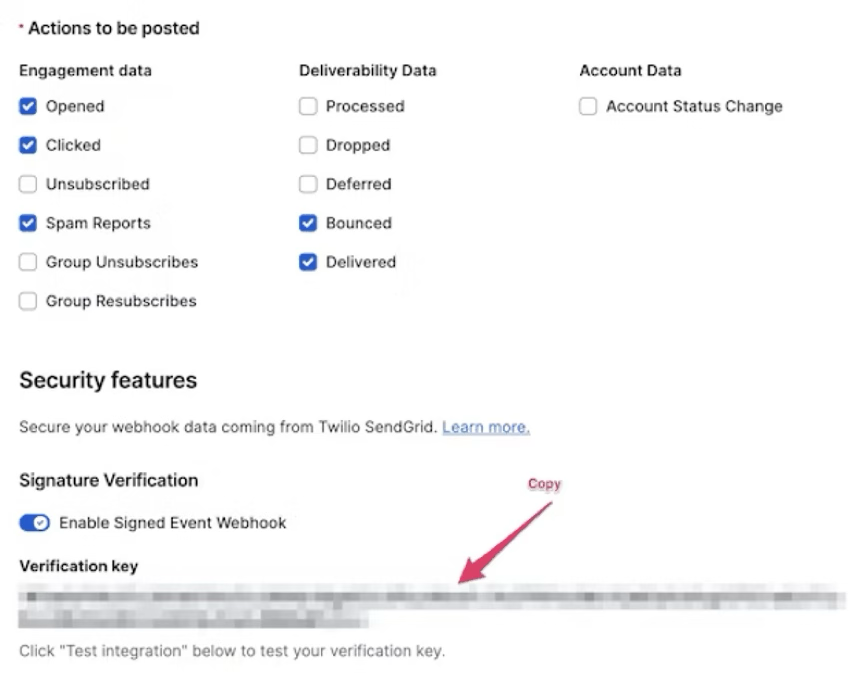
8. Copy Verification Key from SendGrid
Edit the newly created Webhook.

9. Paste the Verification Key in Measure
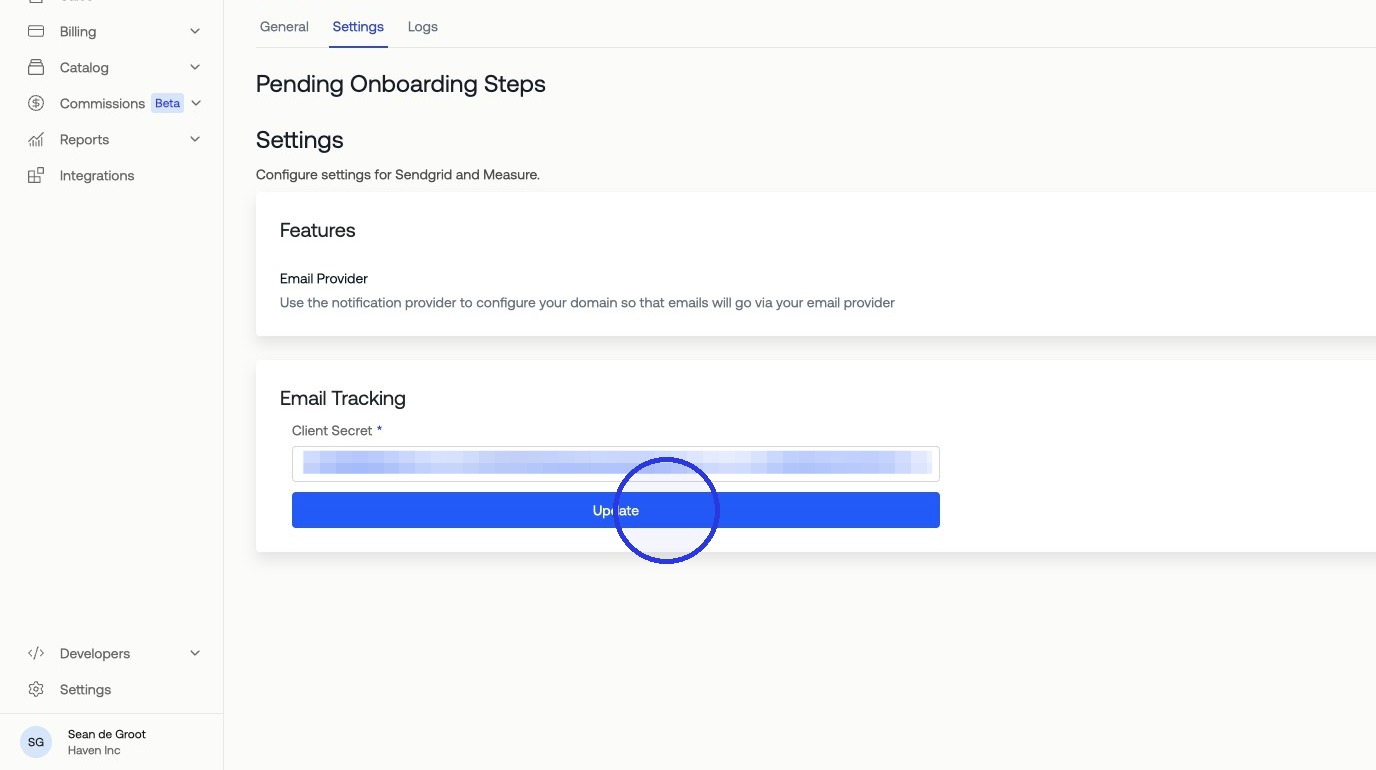
Under General > Email Tracking section, click Edit. Paste the Verification Key copied from Step 8, and click Update.
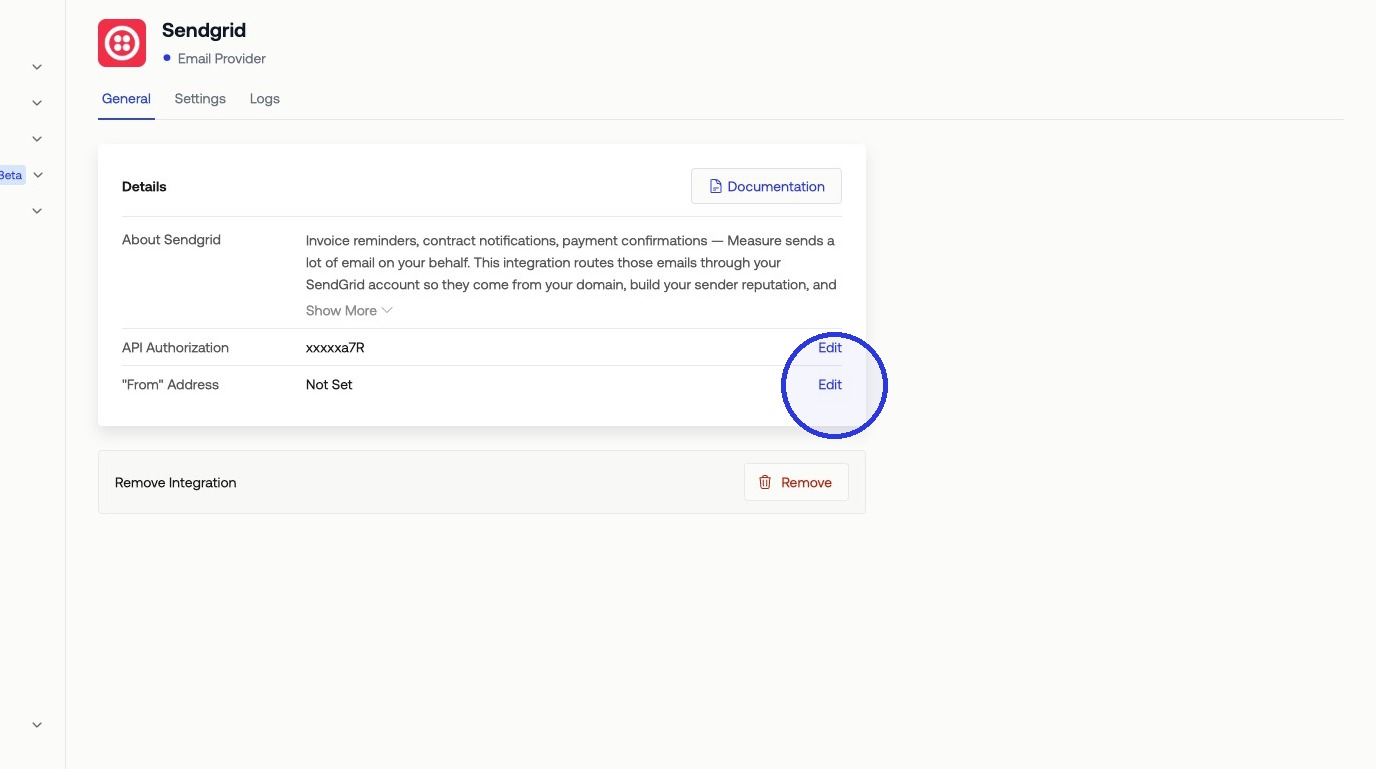
10. Provide "From" Address under the General Tab
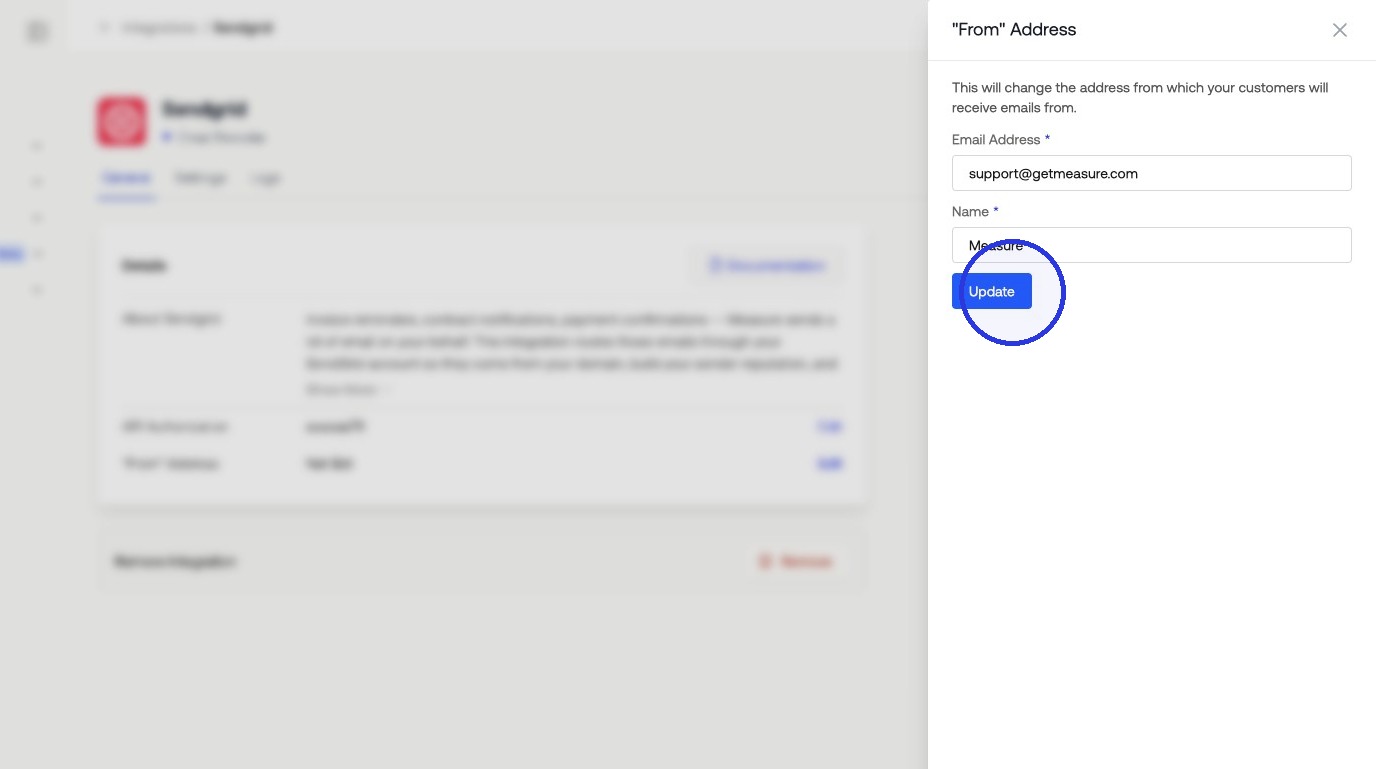
⚠️ Ensure the “From Address” is part of the domain verified, or that is exact “Sender Signature” is added in Step 1.
Your SendGrid integration with Measure is now fully configured. Measure can send emails using your verified domain, track email opens and clicks, and handle bounces or spam reports. You’re ready to start sending transactional and notification emails to your customers.