
Salesforce Integration Overview and Configuration
Measure supports a deep integration with Salesforce to connect your sales workflows with your billing and revenue infrastructure. The integration enables bidirectional data sync, automated contract creation from opportunities, and customizable field mapping between the two systems.
1. Install Salesforce.
Navigate to Integrations in your Measure workspace and select Available Apps. Locate Salesforce in the list and click Install.
2. Connect Account.
Click Connect Account and fill in your Salesforce credentials. Make sure you connect the correct Salesforce account for your organization.
3. Configure Salesforce Integration Settings in Measure.
In the Salesforce card in Measure, turn on the CRM toggle under Features.
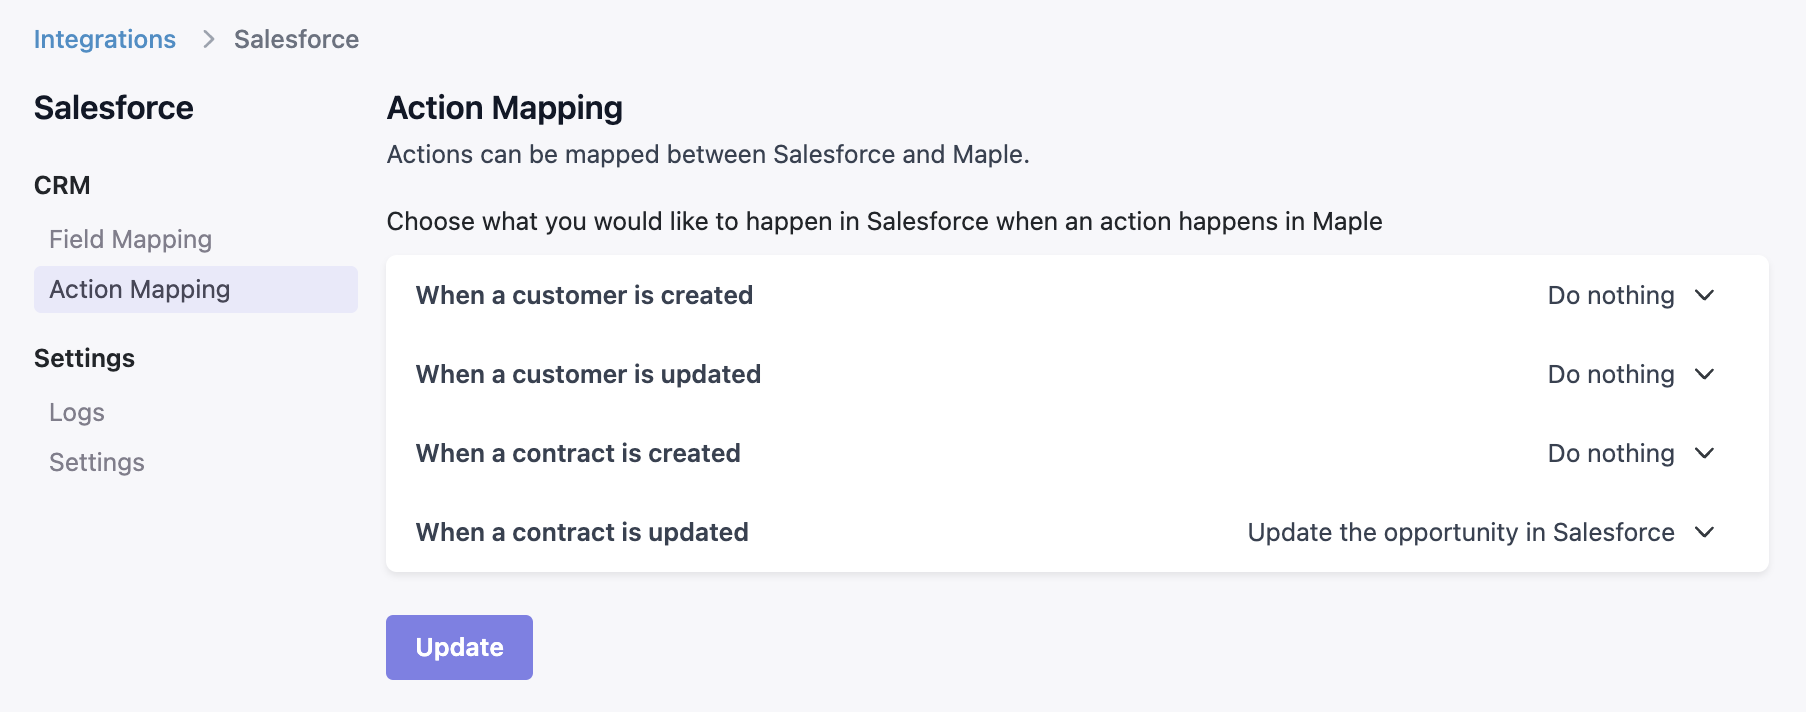
Action Mapping
Action Mapping determines what happens in Salesforce when actions occur in Measure and vice versa. You can configure either Measure or Salesforce to be the source of truth on customer or contract information.
Under Action Mapping, we recommend setting Update the opportunity in Salesforce when a contract is updated in Measure. Be sure to click Update to save your changes.
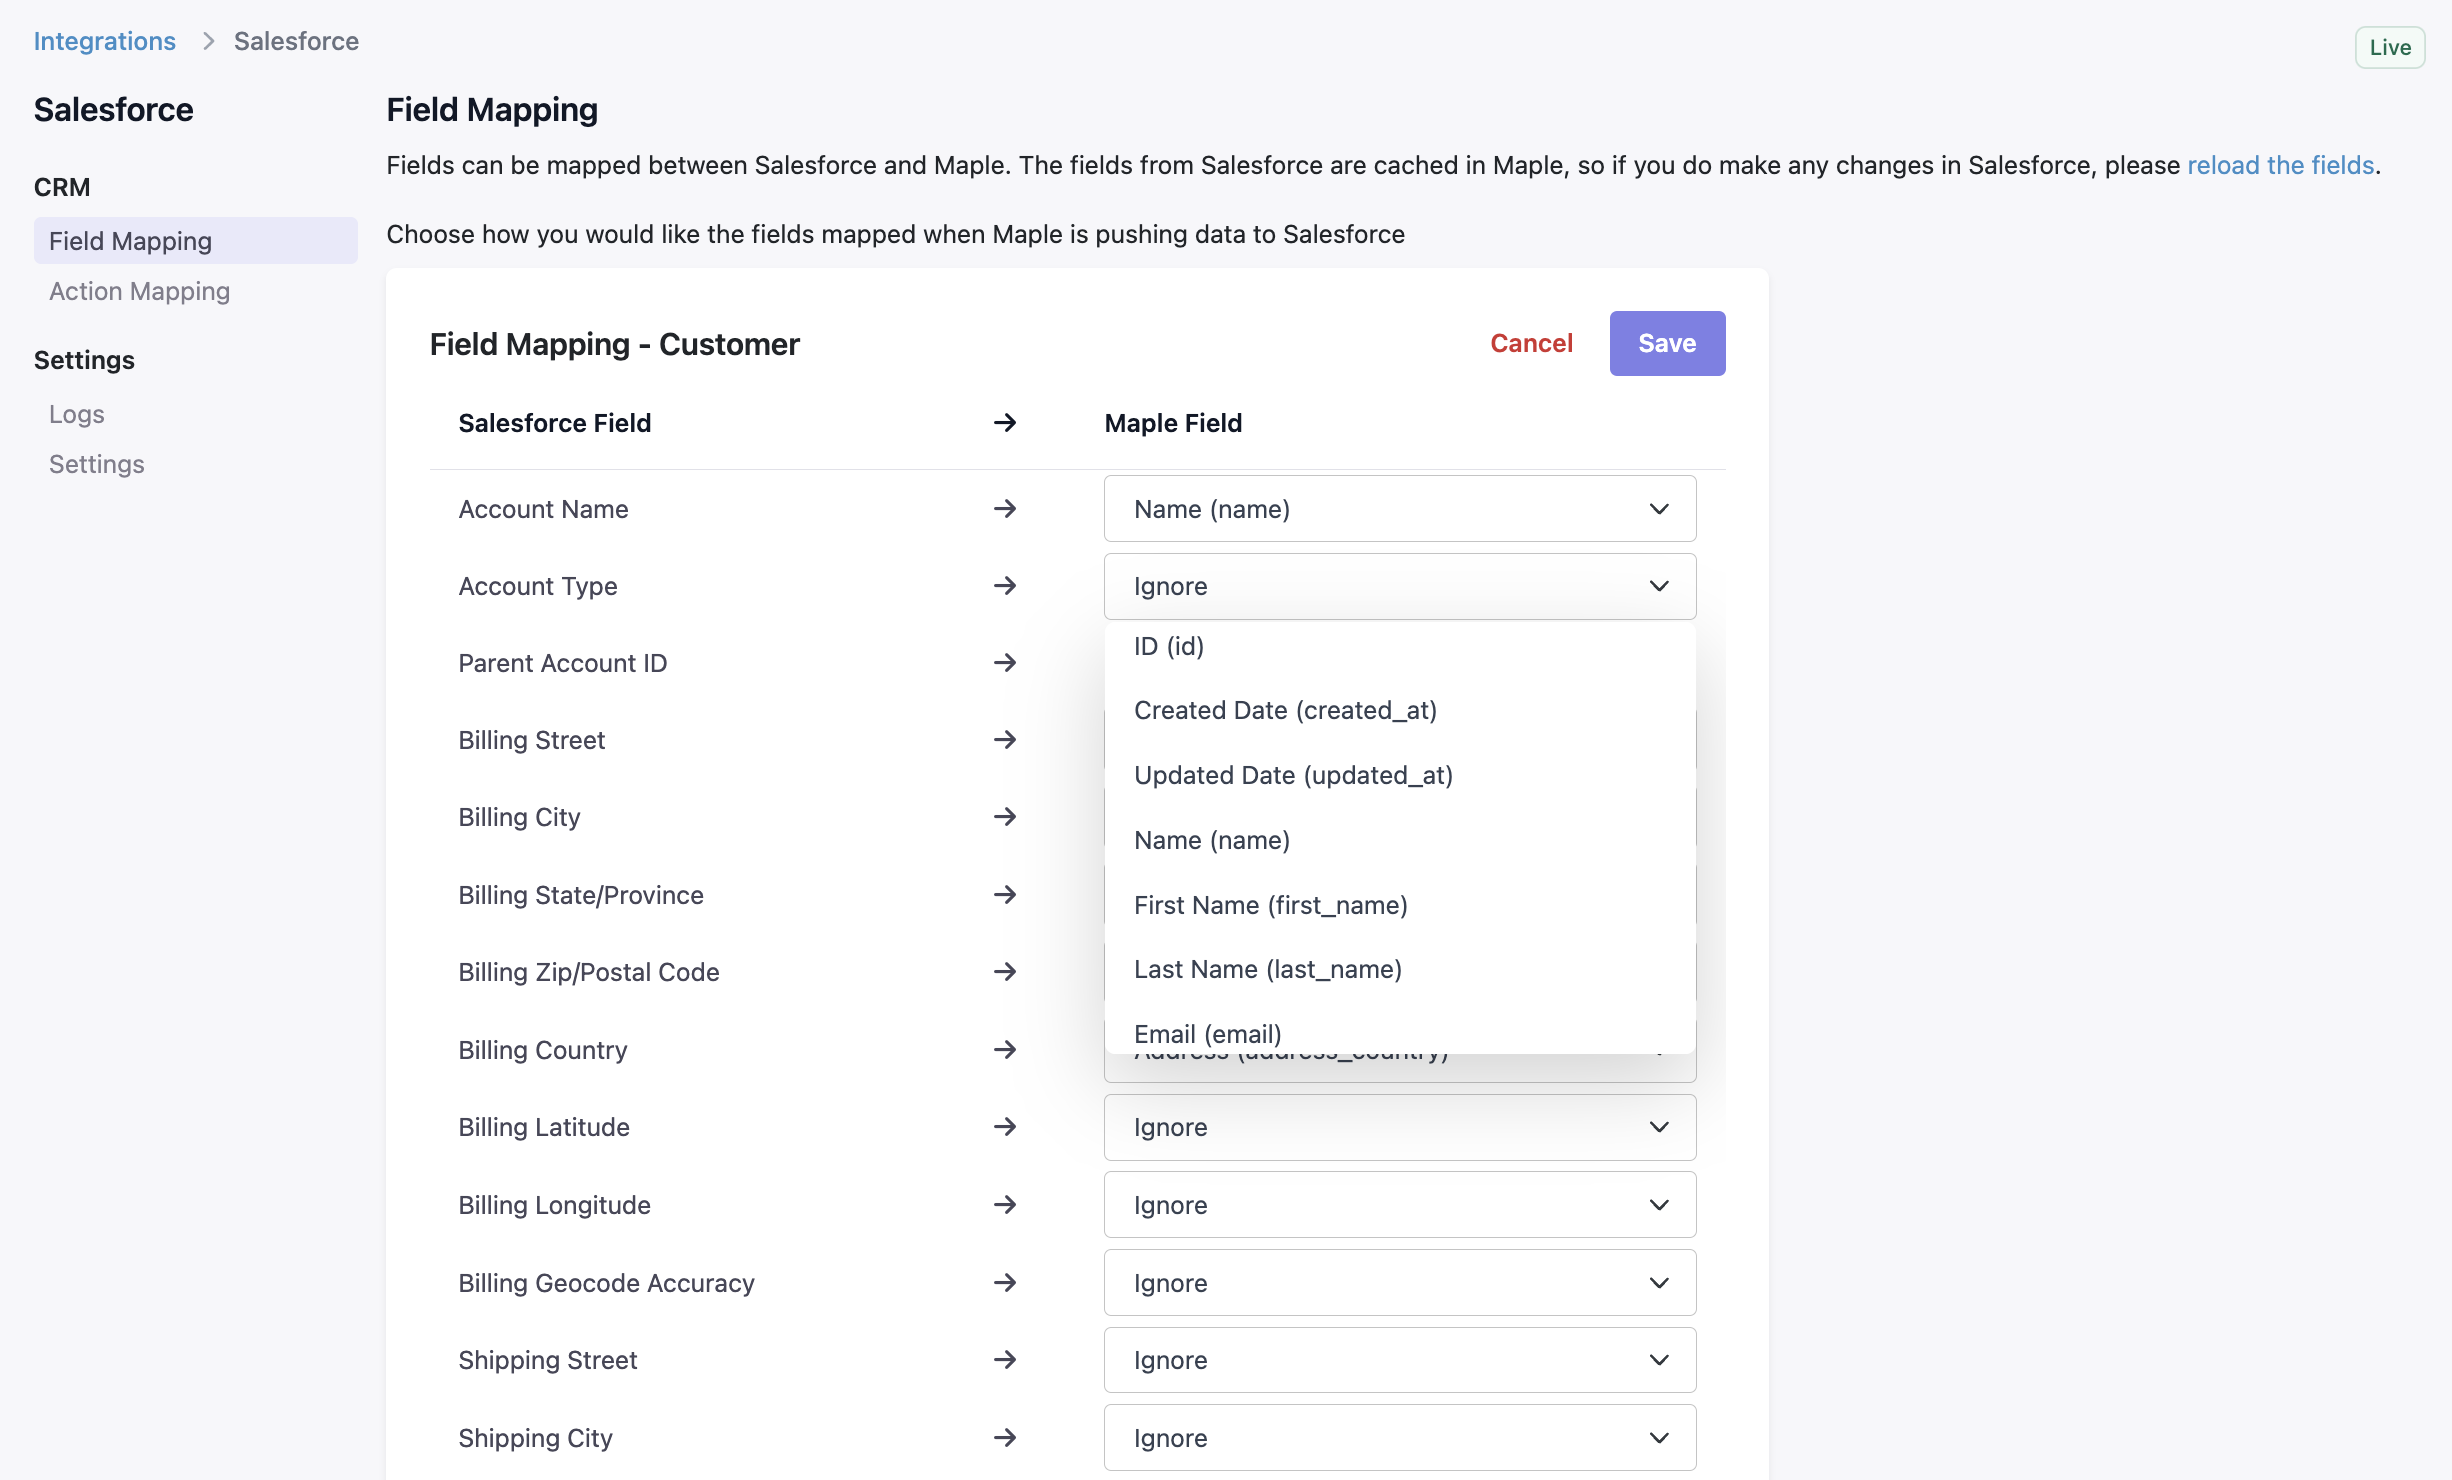
Field Mapping
Field Mapping allows you to configure which fields sync between customers and contracts in Measure and their corresponding records in Salesforce. You can map standard Salesforce fields or custom fields you've created in your Salesforce instance.
Some fields are auto-computed by Measure, while others can be mapped to specific Salesforce fields or set to be ignored. If you add new fields or statuses in Salesforce, you can pull the updated schema and remap as needed.
Recommended Field Mappings:
Amount (Salesforce) > TCV (Measure)
Stage (Salesforce) > Status (Measure). This allows you to map the different stages of your sales pipeline to specific contract-related actions in Measure.
Other Commonly Mapped Fields:
Account Name (Salesforce) > Name (Measure)
Billing Street (Salesforce) > Address (address_line1) (Measure)
Billing City (Salesforce) > Address (address_city) (Measure)
Billing State/Province (Salesforce) > Address (address_state) (Measure)
Billing Zip/Postal Code (Salesforce) > Address (address_zip) (Measure)
Billing Country (Salesforce) > Address (address_country) (Measure)
Account Phone (Salesforce) > Phone (Measure)
Remember to click Save to save your changes.
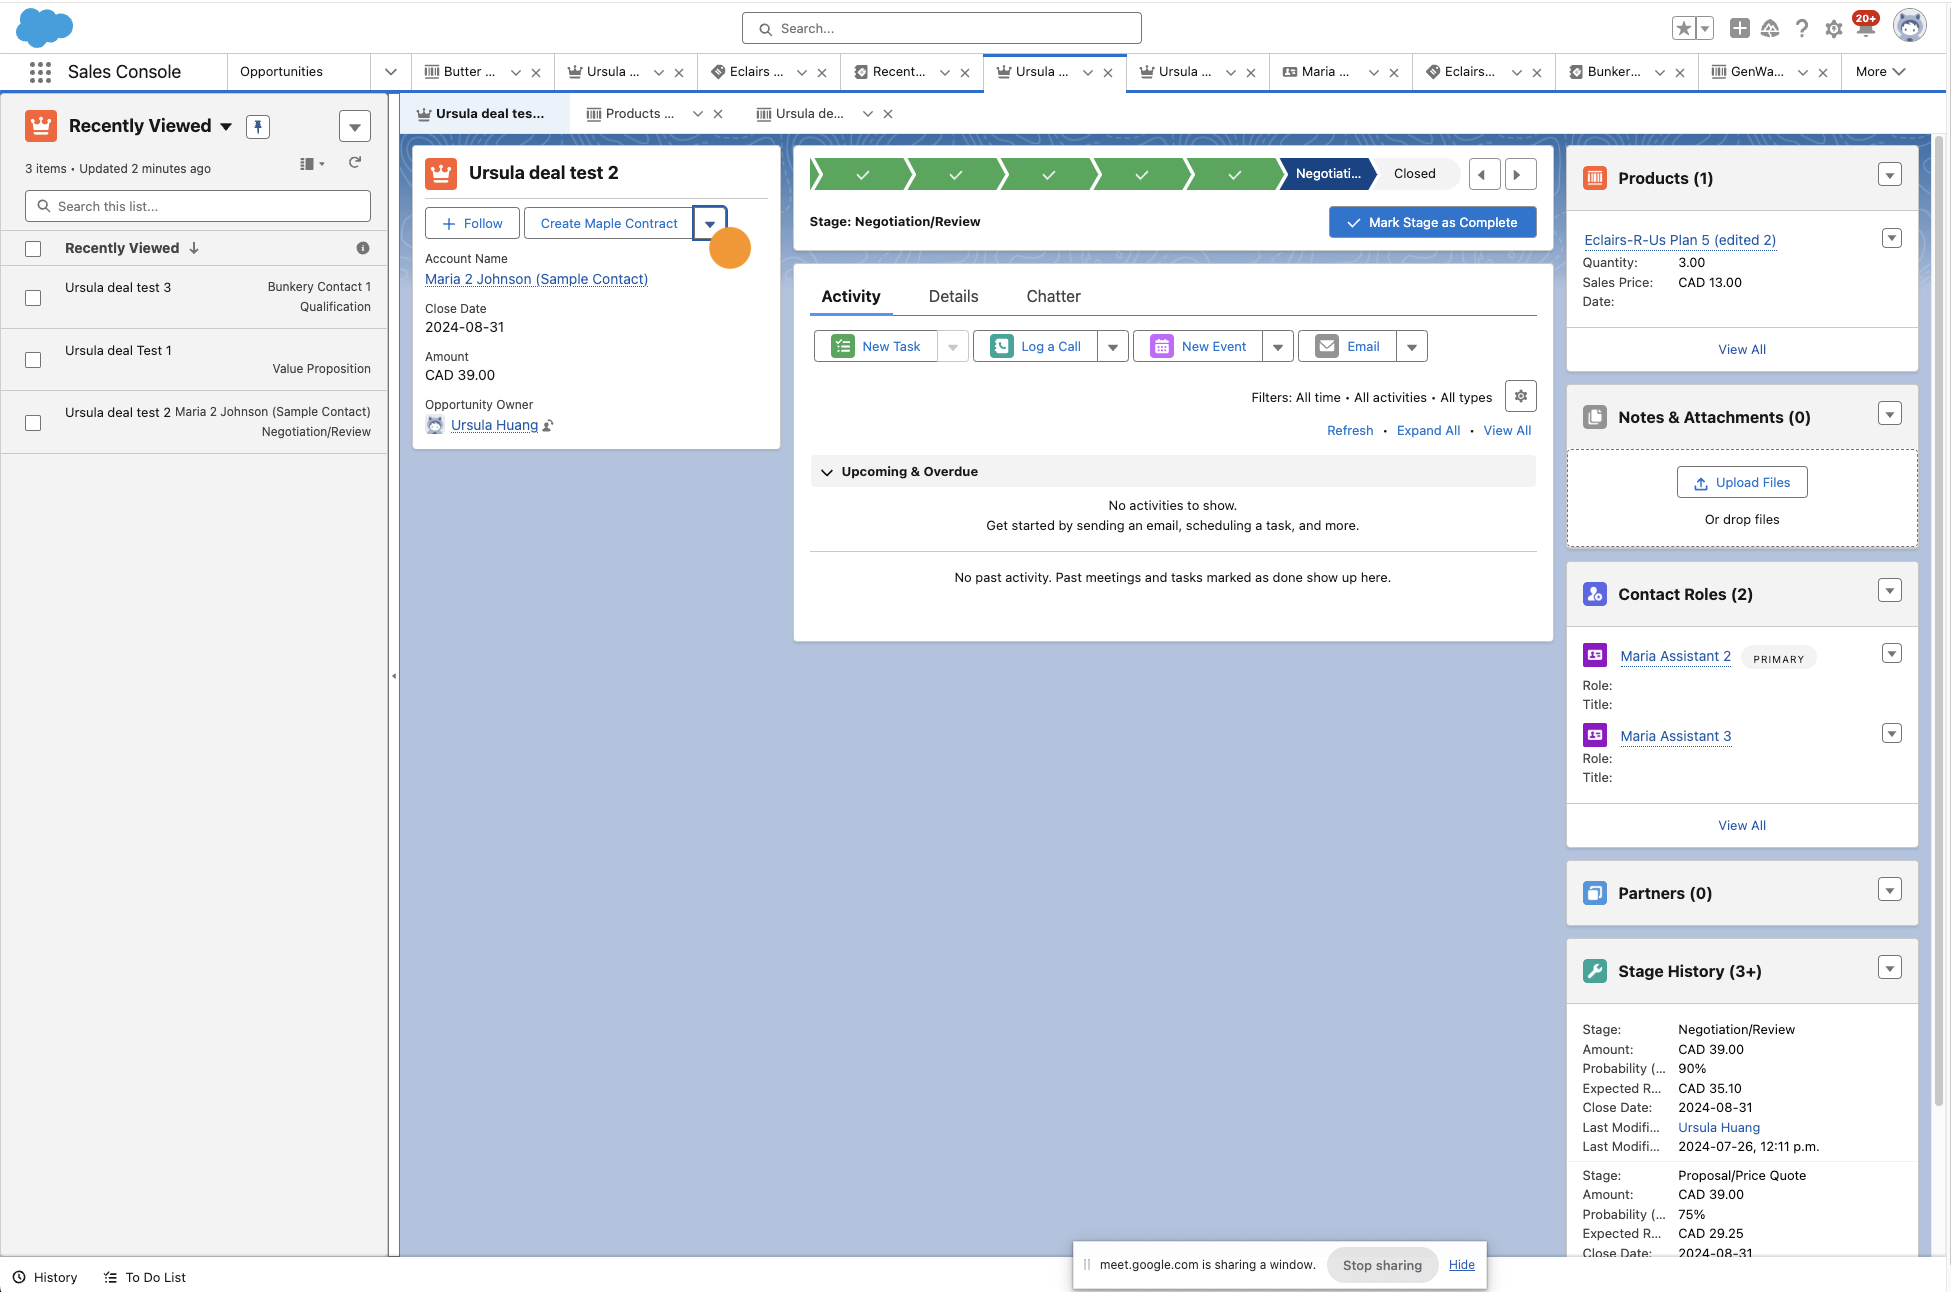
4. Configure Custom Button in Salesforce Opportunity.
To configure a custom button to create a Measure contract or subscription directly from a Salesforce opportunity, refer to the setup steps in the Salesforce documentation for custom buttons.
Creating Contracts from Salesforce
Salesforce can be configured to launch Measure contracts through custom buttons. Once the custom button is set up, you can initiate contract creation directly from the Salesforce Opportunity page. When a sales rep clicks the custom button, Measure pulls the relevant opportunity details and opens a pre-populated contract for review.
Custom Variables
Custom Variables allow you to add your own fields into contract templates. You can create as many custom variables as needed, choosing between string or multi-select types. When you create a contract template, these variables appear in the dropdown and can be inserted anywhere in the document.
When you create a contract from the template, you fill in the values for each custom variable. The variables are then replaced with the actual values when the contract is previewed or sent. This is useful for fields like region, territory, or any other data point specific to your sales workflow that isn't part of Measure's default contract schema.
Price Catalog
You can push your price catalog created in Measure to Salesforce. This allows you to define your pricing model in Measure and access it during your Salesforce deal flow. Your sales team can reference accurate, up-to-date pricing without switching between systems.
⚠️ If your CRM does not support complex pricing structures such as gradient pricing, the price (including the amounts) will be added to the description field of the price in your CRM.